I was recently asked to go out to a school to support a workshop-style tech training session. Teachers were asked to come to the session with an idea of something new they wanted to try or learn more about that involved using tech in their classroom. There was a group of teachers that were interested in helping their students learn how to digitally annotate a text. We spent some time trying different options before they chose one that they felt would work best for their students.
I first learned about this digital annotation strategy in a blog post on Matt Miller's blog, Ditch That Textbook. This was actually a guest post written by Joe Marquez titled "Redefining annotation: Ditch That PDF and hyper-annotate." In this post, Marquez encourages teachers and students to "level up" annotation practices rather than just substituting a digital highlighter and doing the same things they are already doing on paper. Marquez provides several awesome ideas for how to "level up," and I'm going to share my version of one of those ideas.
Step 1: Find an Article
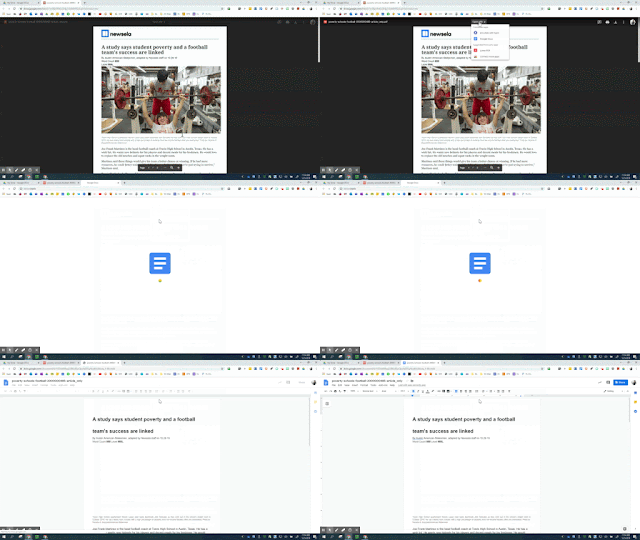
For this activity, you first need to find a PDF that you want your students to annotate. I used a current event article from Newsela.Step 2: Convert it to Google Docs
Once the PDF is in your Google Drive, open it and click the "Open with" button in the top center of the screen. Then, select Google Docs.
Step 3: Copy and Paste the Article
Because some of the teachers I work with are just starting to use Google Apps in their classrooms, I made a template that they could use to get started with this activity. Click here for the template (press the blue button in the top right corner if you would like a copy for yourself).Copy and paste the article into the first column of the table. Chunk the article into sections so that students slow down, think about what they read, and share their thinking before moving on to the next piece of text.
Here is an example of a table that is ready to share with students. I simply copied and pasted a few paragraphs at a time into each cell.
Step 4: Model for Students
In the middle column, students will share their thinking about that "chunk" of text. I always included a link to sentence frames in case students were struggling with how to start their explanation.
In the final column, students can insert an image and then explain how that image relates to the text.
When I used this with my students, I made a screencast video to model how to annotate and explain my thinking. They watched this at their own pace as they practiced writing their first annotation. I would check in with them in small groups once they had attempted their first annotation. There are many tools you can use to make videos, but I always liked Screencastify.
If you use Google Classroom, then you can easily share this as an assignment and set it to make a copy for each student.
I hope that this has been helpful for you if you are looking for ways to help students learn how to digitally annotate!


vstpatch.net
ReplyDeletePDF Annotator Crack
Snapchat For PC Crack
FIFA Crack
Drip Fx VST Crack
Plugin Alliance Bundle Crack
Wow, amazing block structure! How long
Have you written a blog before? Working on a blog seems easy.
The overview of your website is pretty good, not to mention what it does.
In the content!